Recently I was contacted by the company who produces
Chalk Markers to give them a try....I mentioned it in passing a while ago, but now I am ready to start showing some projects and give you info about playing with them. There's some amazing projects for those of you who already KNOW you love chalk markers, check out their Facebook Group
(click here). I see lots of other craft avenues using these markers so I was really excited to see how they would work for papercrafts and cardmaking.
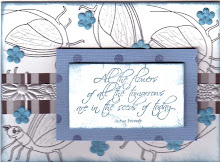
This card here is very simple, I used the marker on the rubber stamp of the skull, I simply colored the white
chalk marker (yeah, this white marker, it's going to be my favorite) on the rubber, I spritzed the stamp once with a water bottle (mist, not spray) and then stamped it. Stamped beautifully. I could also spritz the stamp again to get additional images, usually 2, sometimes 3, but your third image will be very limited. I am only using black paper here, not "chalk" paper (which I have some of, to show later). I also used the markers, which have a very broad tip, to add polka dots to the card. LOVE the even consistency of these pens. I do wish they had interchangeable tips, so you could get different sizes.
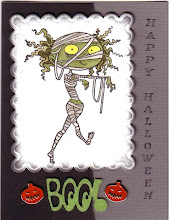
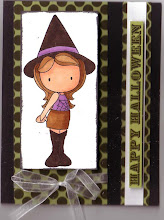
Here was a little Halloween fun where I took a sheet of embossed images in black (all six images on the left and right). I took the chalk marker and ran it very loosely over the embossed area to highlight it and then used a circle punch to punch out the circles. I am also using the same skull stamp as project #1. I used the chalk marker in orange to edge the happy Halloween word blocks.
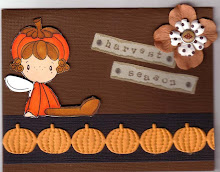
Here's another fun card that I did using a combination of
Chalk Markers and Paper Temptress Papers. You can't tell from the photo, but I actually used a transparency, embossed the transparency using a Darice Embossing folder of Witches shoes and then used my Chalkola markers to color on the BACKside of the transparency which I then layered on top of a Hambly Screen print. How bright and vivid are these markers here?
The base of this card is a 5.5" piece of
Dark Orange Basis. I then used part of a 6x6" piece of a
Hambly Studio Screenprints. It is available in one of the
6x6" variety packs or as a 12x12" piece and is called Home Décor. I used a bright flash on one side so you can see it's shimmer and tell that it has beautiful prints of decorator items like chandeliers and other home items (that make me think of a haunted house for this card). The Pumpkin Stacks as well as the space behind the happy haunting embellishment are used to adhere the
Transparency to the card front. Then I added some fun glittery stars to the Top side of the transparency to give some additional depth.
I hope this card gives you some wonderful crafty ideas for a quick and cute Halloween card. You can both run your transparencies through your sizzix machine to get some depth as well as color the backside to add even more!
That's my initial set of
Chalk Marker projects, I have several more where I did some more stamping and colored on them.
Click HERE to see more projects I did with their markers.


